http://pinterest.com/pin/195765915022243266/
meetthedubiens.com
Paint your childs hand one color for the cake and different colors for the candles (minus the thumb!). Stamp onto white piece of paper and let dry. Mount it to a piece of colored paper (or tag board works great). Let your child write a special message inside.
Starting February 25th 2012, My family and I are going to see how many "pins" from Pintrest.com we can do in a year.
Saturday, September 8, 2012
Friday, September 7, 2012
Twisted side bangs
http://pinterest.com/pin/195765915022671058/
youtube.com
As I mentioned yesterday my daughters hair is very thin/fine and her hair seems to grow into her face (weird, I know). Anyway I saw this on pintrest and it literally takes a minute and a half to do- which was perfect because once again I found myself rushing out the door this morning. The youtube video does an amazing job at explaining it. In case you don't want to watch the video here is what you do:
Take a small section of hair at the top of your head, take another section (a little lower than the first one) put it under the first stands and twist. Keep going until you think you're done. I added a twistie at the end of ours and then bobby pinned it back (with the hair spray: trail # 2!)
Verdict: After 7 hours of school/play the results are:
youtube.com
As I mentioned yesterday my daughters hair is very thin/fine and her hair seems to grow into her face (weird, I know). Anyway I saw this on pintrest and it literally takes a minute and a half to do- which was perfect because once again I found myself rushing out the door this morning. The youtube video does an amazing job at explaining it. In case you don't want to watch the video here is what you do:
Take a small section of hair at the top of your head, take another section (a little lower than the first one) put it under the first stands and twist. Keep going until you think you're done. I added a twistie at the end of ours and then bobby pinned it back (with the hair spray: trail # 2!)
Verdict: After 7 hours of school/play the results are:
Thursday, September 6, 2012
Keeping a bobby pin in place
http://pinterest.com/pin/195765915022819003
http://prettygossip.com/2012/03/07/i-%e2%99%a5-sticky-bobby-pins/
My daughter and I have pretty thin/fine hair. Hers is actually worse than mine in the sense that a bobby pin never stays in her hair. Or it stays and the hair just slips right out. Which is bad because then her hair is in her face. Which means mornings of 10 minutes spent on french braided pigtails or side braids (which gets old not only for her who has to sit still, but for me who somehow runs behind every morning now). Today I decided to see if this pin would actually work for her at school
So we sprayed the bobby pins on a paper towel with some hairspray. We let it set, and stuck them in her hair- and sprayed her head some more for good measure. I sent her to school and after 7 hours the results are in :
They moved (not sure if she moved them or not- she had to have because one is now missing...)and her hair looks like she stuck her head out the window on the freeway...
Trial number two: coming soon
It didn't stay either. This time she didn't touch it. I guess we'll have to find other bobby pins? The mom on the youtube video recommended the Sally brand
http://prettygossip.com/2012/03/07/i-%e2%99%a5-sticky-bobby-pins/
My daughter and I have pretty thin/fine hair. Hers is actually worse than mine in the sense that a bobby pin never stays in her hair. Or it stays and the hair just slips right out. Which is bad because then her hair is in her face. Which means mornings of 10 minutes spent on french braided pigtails or side braids (which gets old not only for her who has to sit still, but for me who somehow runs behind every morning now). Today I decided to see if this pin would actually work for her at school
So we sprayed the bobby pins on a paper towel with some hairspray. We let it set, and stuck them in her hair- and sprayed her head some more for good measure. I sent her to school and after 7 hours the results are in :
They moved (not sure if she moved them or not- she had to have because one is now missing...)and her hair looks like she stuck her head out the window on the freeway...
Trial number two: coming soon
It didn't stay either. This time she didn't touch it. I guess we'll have to find other bobby pins? The mom on the youtube video recommended the Sally brand
Practice cutting shapes
http://pinterest.com/pin/244461085993292900/
http://www.activityvillage.co.uk/cutting_skills_printables.htm
Some of my daughters Kindergarten monthly homework requires her to practice cutting things out with scissors.This month is shapes. So I searched pintrest and amazingly enough found exactly what I was looking for. I went to the main page and printed off the pages I wanted and let my daughter practice.
http://www.activityvillage.co.uk/cutting_skills_printables.htm
Some of my daughters Kindergarten monthly homework requires her to practice cutting things out with scissors.This month is shapes. So I searched pintrest and amazingly enough found exactly what I was looking for. I went to the main page and printed off the pages I wanted and let my daughter practice.
Tuesday, September 4, 2012
The Fresh Banana Theory
Two Pins, Two theories. Which works??
Wrap the tops of the banana in tin foil:
http://pinterest.com/pin/195765915023364709/edit/
http://snapguide.com/guides/keep-bananas-fresh-longer/
Separate the bananas:
http://pinterest.com/pin/195765915023389559/
DAY ONE:
Supposedly both ideas keep the banana's fresher longer. Now the problem I have with these are: How do you know if you've got nothing to compare?? So I took our fresh Banana's and separated them. I have 3 wrapped in tin foil, two still together and two separate. All from the same bunch.
DAY THREE:
Still looking alright. all of them are ripening about the same pace ( the tin foil ones slower than the rest, the two together faster)
DAY FOUR
All show brown dots. The two together the most.
Verdict: I think separating them does help it slow down the ripening process. However I can't do any more tests because they all ended up in lunches this morning.
Wrap the tops of the banana in tin foil:
http://pinterest.com/pin/195765915023364709/edit/
http://snapguide.com/guides/keep-bananas-fresh-longer/
Separate the bananas:
http://pinterest.com/pin/195765915023389559/
DAY ONE:
Supposedly both ideas keep the banana's fresher longer. Now the problem I have with these are: How do you know if you've got nothing to compare?? So I took our fresh Banana's and separated them. I have 3 wrapped in tin foil, two still together and two separate. All from the same bunch.
DAY THREE:
Still looking alright. all of them are ripening about the same pace ( the tin foil ones slower than the rest, the two together faster)
DAY FOUR
All show brown dots. The two together the most.
Verdict: I think separating them does help it slow down the ripening process. However I can't do any more tests because they all ended up in lunches this morning.
Monday, September 3, 2012
Oven Baked Corn
http://thepost-itplace.com/2012/05/baked-corn/
http://pinterest.com/pin/53339576807057020/
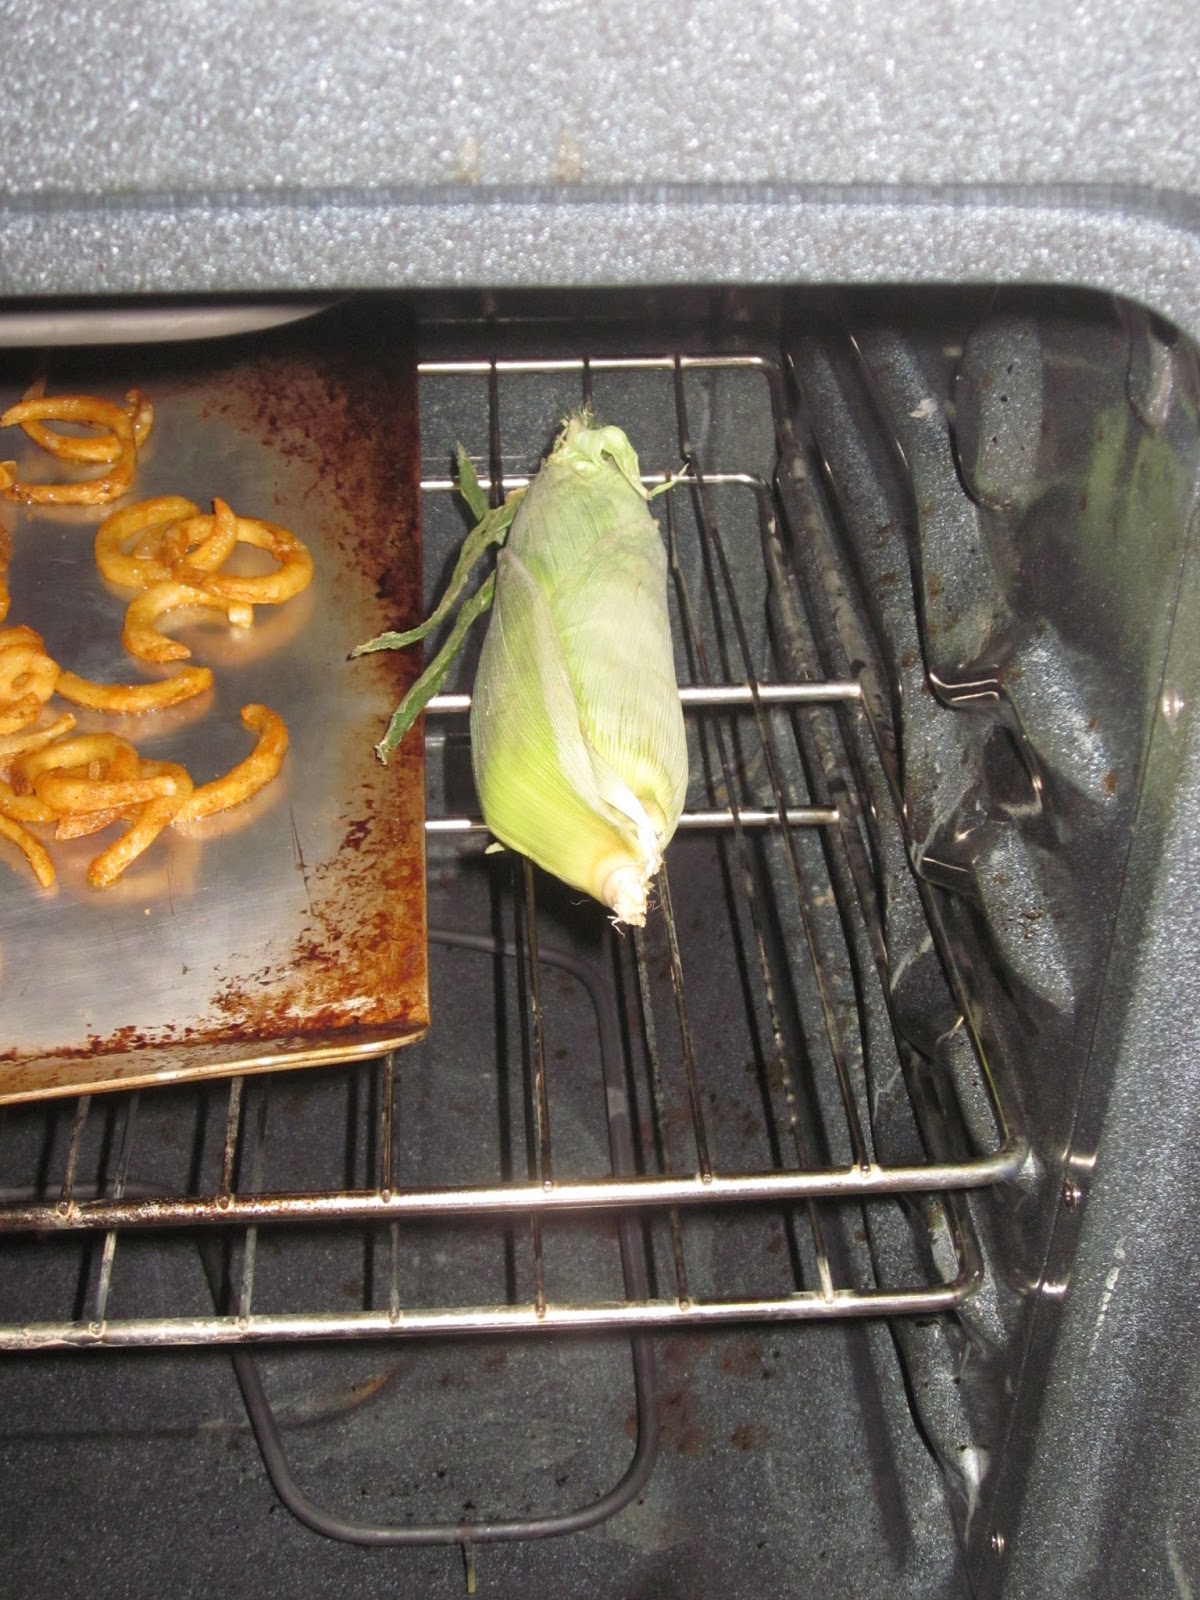
I love corn, no lie. Fresh corn is my favorite for obvious reasons. I haven't done a pin in a couple of days and I thought I should do one with dinner. Since we were barbequing for Labor day and I have alreayd grilled corn I figure: let's bake it!
Pre heat oven to 350 and cook in husk for 30 minutes. Seriously, that's all the original blogger says.
I mean sure, once it's out you pull the husks back. The silk is supposed to just fall off- mine didn't really get the memo and while cutting the kernels off for my daughters (sad, I know) I kept getting the silk in the corn. Butter, salt and pepper to taste
Verdict: It is good, however I think I still like grilled better. This is a great alternative to boiling only if you plan on baking something anyway. I think if I were to bake it again, I would do like in grilling which is : Soak for 15 minutes, pull husks down but not off, remove silk, add butter salt and pepper, bake.
http://pinterest.com/pin/53339576807057020/
I love corn, no lie. Fresh corn is my favorite for obvious reasons. I haven't done a pin in a couple of days and I thought I should do one with dinner. Since we were barbequing for Labor day and I have alreayd grilled corn I figure: let's bake it!
Pre heat oven to 350 and cook in husk for 30 minutes. Seriously, that's all the original blogger says.
I mean sure, once it's out you pull the husks back. The silk is supposed to just fall off- mine didn't really get the memo and while cutting the kernels off for my daughters (sad, I know) I kept getting the silk in the corn. Butter, salt and pepper to taste
Verdict: It is good, however I think I still like grilled better. This is a great alternative to boiling only if you plan on baking something anyway. I think if I were to bake it again, I would do like in grilling which is : Soak for 15 minutes, pull husks down but not off, remove silk, add butter salt and pepper, bake.
Thursday, August 30, 2012
Dinner Rolls and Hassleback Potato
http://pinterest.com/pin/195765915022545900/
http://www.kingarthurflour.com/recipes/big-batch-quick-dinner-rolls-recipe
Directions:
Mix water, milk, butter, sugar, salt and yeast into mixer- turn on for a few minutes and then let rise until yeast has foamed a little.
Next add 3 cups of flour, mix thoroughly.
Add 1/2 a cup of flour at a time until the dough is slightly firm- but not a lot. Plavcec it in a greased bowl for 20 minutes until it rises.
After the dough as risen, roll it out into a rectangle. Cut the dough into 12 pieces, then form into a ball.
You can either place them on a sheet, like I did or other pans (see original post)
let them rise again for 20 minutes. After that bake at 250 for about 20 minutes.
Verdict: I think they kinda taste like pretzels... not bad though :/
POTATOES
http://pinterest.com/pin/195765915023309946/
seasaltwithfood.com
So I started by washing my potatoes. Then I sliced them thinly (not cutting all the way through). I added some garlic slivers into each opening of the potato, drizzled some olive oil and butter over them and finished with some salt and cracked pepper
Bake at 425 for about 40 minutes or until golden:
Verdict: Not bad; I added a little too much pepper. I loved the garlic flavor and the slight crispiness of the top of the potato- however, I feel like my centers weren't soft enough like a baked potato.
http://www.kingarthurflour.com/recipes/big-batch-quick-dinner-rolls-recipe
- 1/2 cup lukewarm water
- 2 cups warm milk ( 100 - 110°F)
- 3 tablespoons butter
- 2 tablespoons sugar
- 1 tablespoon salt
- 2 1/2 tablespoons yeast, instant preferred
- 6 to 7 cups King Arthur Unbleached All-Purpose Flour
Directions:
Mix water, milk, butter, sugar, salt and yeast into mixer- turn on for a few minutes and then let rise until yeast has foamed a little.
Next add 3 cups of flour, mix thoroughly.
Add 1/2 a cup of flour at a time until the dough is slightly firm- but not a lot. Plavcec it in a greased bowl for 20 minutes until it rises.
After the dough as risen, roll it out into a rectangle. Cut the dough into 12 pieces, then form into a ball.
You can either place them on a sheet, like I did or other pans (see original post)
let them rise again for 20 minutes. After that bake at 250 for about 20 minutes.
Verdict: I think they kinda taste like pretzels... not bad though :/
POTATOES
http://pinterest.com/pin/195765915023309946/
seasaltwithfood.com
So I started by washing my potatoes. Then I sliced them thinly (not cutting all the way through). I added some garlic slivers into each opening of the potato, drizzled some olive oil and butter over them and finished with some salt and cracked pepper
Bake at 425 for about 40 minutes or until golden:
Subscribe to:
Posts (Atom)