Wednesday, February 29, 2012

French Bread

Pintrest Objective: http://pinterest.com/pin/280067670546617442/


I love bread and I love Spaghetti- tonight I just felt like eating Spaghetti so I'm going to need some French Bread.  My husband and I just went to Costco where he bought me a 25 pound bag of flour (he really knows how to get a girl :)  )


What you'll need:
2 1/4-2 3/4 cups of flour
1 cup of warm water
1 packet of yeast
1 teaspoon salt
1 TABLEspoon sugar

For top:
1 egg white
1 TABLEspoon water

Directions:
Pour all ingredients into mixer. Mix for 5 minutes.  Add extra flour if needed.


Shape into ball and placed in grease bowl. Let it rise for 45 minutes in warm place (ovens are super helpful)
 After

After it has risen, place on flour surface and roll the dough out into the shape of a rectangle.


Next, roll it out like a jelly roll. An alternative here is to just roll it out in the shape of a french bread roll. That's what we use to do at Safeway.


place on a cookie sheet (the directions from the site don't say this, but in the bakery we use to add cornmeal to the bottom of our pans so the bread doesn't stick).  and let it rise again for 30-45 minutes.
 after
This is about where I feel like my recipe went awol...


Preheat the oven to  400 degrees. In a small bowl, whisk together egg white and 1 tablespoon of water. Cut 3 slits into the dough


brush onto the top of the bread and bake for 15-20 minutes until golden brown.
FAILED. Oh  I am so irritated. It still tastes good, a little too sweet...but it flopped itself. I have never had this many problems with things I bake. Screw that. I'm making  a pizza.


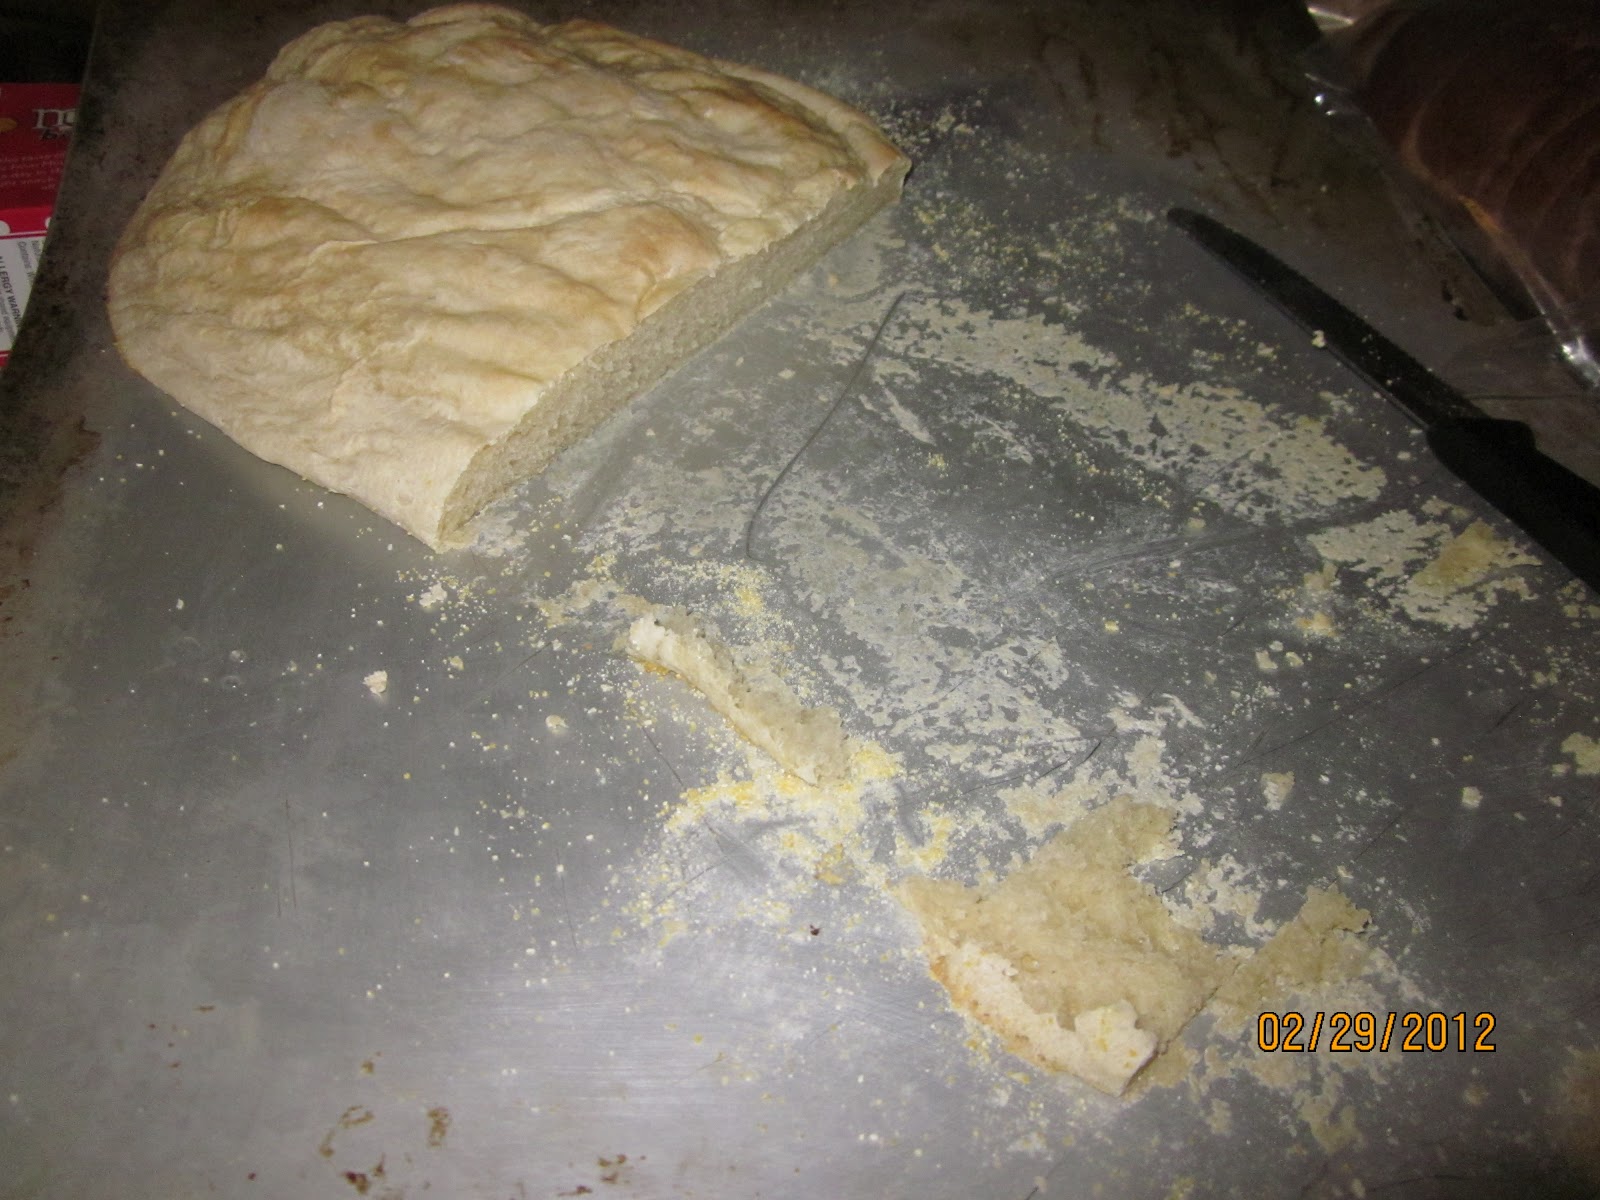
I may have only kinda failed... I mean my family did it more than 3/4 of it! haha.
It's edible and all, it just doesn't look pretty and I don't think it would qualify as French Bread.


 Alright, so after being irritated the rest of the night and making a good pizza instead, I googled what happened. Turns out it over proofed the second time (I had to go get my daughter from school). I will not let this get me down. I'm going to try again!


Orignally posted by: .thefrugalgirl

Tuesday, February 28, 2012

Tooth Fairy pouch

Pintrest objective: http://pinterest.com/pin/195765915021950960/

This morning over my morning cup of coffee, I was skimming pintrest looking for something to sew (Hey, If I do food everyday my waistline will grow and I'm out of cinnamon anyway). So I was going to make a tooth pillow for my oldest who is 6 and losing teeth now (this is where I shudder) Then I was going to make something else (I have no plan here people... I started this blog a little earlier than I planned. I wanted a schematic and everything...I don't have one)

After seeing another pin about February 28th being National Tooth Fairy Day, I have to do it :)


What you need:
Felt
Needle
Threads
stuffing
Sewing machine

1) The pillow itself will be a square. This can be as big as you want.


2) After I have my square I placed white felt over it to see how big I was going to need the tooth to be. I sketched it onto the white felt and cut it out.


3) Next I took black thread and made two French Knots for the eyes and a red back-stitched mouth. (Need help learning these stitches? try my blog: Sew Crafty Mommy).

4) Next sew the tooth to the pillow- make sure to leave the top open.
5) Using the blanket stitch, stitch around the tooth, making sure not to go through the pillow.
Use the Blanket Stitch the whole way around the tooth:

6) with "right sides" together, sew the pillow around all four sides, leaving a small hole to pull the pillow right side out.

7)Once the pillow is the right way, stuff the pillow with batting and stitch together using the Ladder Stitch

Ta da!


I realized after it was stitched together that the tooth is crooked. Oh well, it's still cute :)

Monday, February 27, 2012

Clone of the Cinnabon

Pintrest objective: http://pinterest.com/pin/195765915021963560/


What you'll need:
  • 1 cup warm milk (110 degrees F/45 degrees C)
  • 2 eggs, room temperature
  • 1/3 cup margarine, melted
  • 4 1/2 cups bread flour (can substitute regular flour for this: check here.)
  • 1 teaspoon salt
  • 1/2 cup white sugar
  • 2 1/2 teaspoons bread machine yeast (also regular yeast)
If you're iffy about this recipe. Try my  Grandpa Minick's Famous Sticky Buns dough.

Inside the dough
  • 1 cup brown sugar, packed
  • 2 1/2 tablespoons ground cinnamon
  • 1/3 cup butter, softened
Icing:
  • 1 (3 ounce) package cream cheese, softened
  • 1/4 cup butter, softened
  • 1 1/2 cups confectioners' sugar
  • 1/2 teaspoon vanilla extract
  • 1/8 teaspoon salt

Dissolve the yeast in the warm milk in a large bowl. I on the other hand, don't have a microwave right now... So I had to do it "old school".


So the geek in me was watching the yeast rise... I actually caught it on film. I think it's pretty awesome...but that's beside the point.


Mix in the sugar, margarine, salt, and eggs. Add flour and mix well.


  (Anyone who knows me from my blog: Sew Crafty mommy knows Pascal from Tangled, lives in my kitchen)


Put in greased bowl, cover and let rise in a warm place about 1 hour, or until doubled in size. If your house is not warm, turn it on to the lowest setting and let it heat. Then turn it off and place the dough inside.

Before. 
 After:


Punch dough down and on buttered surface (trust me. My grandpa was a genius). roll out the dough.


Sprinkle sugar mixture on


Roll up and place in greased pan ans cut them.

Let rise in oven for another 30 minutes
 Before:


After:


After the rolls have risen once again. Pre-heat the oven to 400 degrees and bake for 15 minutes or until golden brown.

While rolls are baking, beat together cream cheese, 1/4 cup butter, confectioners' sugar, vanilla extract and salt. Spread frosting on warm rolls before serving. 


For a  caramel glaze, try my Grandpa's recipe at the top.

Want to be festive? try adding food coloring to the mix before letting it rise:


Verdict?  * * * * * Five Stars! I love the icing. It tastes SO much like Cinnabon it's freaky.  Thanks to Pintrest I'm never going to have to eat out again!

If you found this fun or helpful, please follow me. It gets a little lonely over here thinking that I'm talking to myself. 


 I think my grandpa's roll recipe is better...but I also miss him.

Sunday, February 26, 2012

The Baby Doll Sling


Pintrest Objective: http://pinterest.com/pin/195765915022140831/

So Hailey is obsessed with bringing Nora everywhere with her right now. The problem? she walks really slow and wants to hold Nora in not one arm, but both. I saw this on Pintrest and instantly wanted one for Hailey.  I also just unpacked all of my fabric and I'm ready to go!


What you need:
tape measure
scissors
fabric and thread
sewing machine
pins


1) Start by measuring the baby doll in question ( I did not do this, because I wanted the sling to also fit Minnie, Hailey's 15" doll who was still in a box somewhere). Cut the piece of fabric 10" wide and 6" longer than the doll (in my case 21" long, 10" wide).

2) Measure your childs back from shoulder to waist (it doesn't matter which side). Make this cut 6" wide by whatever length you got from your measurement. This will be your shoulder strap.

3) Sew right sides together on shoulder strap, turn right side out.

4) Hem the body piece of fabric and gather edges together.

 This is a picture of the hemmed body piece and the right side out strap.

5) Gather the ends big enough to fit into the slings straps. I folded the end of the strap in to make it smooth


 6) Test on your child and sew together.


The Verdict? I think the baby would stay better this some elastic in the corners too. Other than that, Hailey loves it!


Originally blogged by:
thelittlegiggler.com

Saturday, February 25, 2012

Kettle Corn

My very first Pintrest Challenge is:

http://pinterest.com/pin/195765915022282059/

What you'll need:

  • 1/2 cup popcorn kernels
  • 1/4 cup sugar
  • 1/4 cup vegetable oil
  • Salt to taste

Directions:

1. Heat vegetable oil in a large kettle over medium heat. Toss in 3 kernels and cover with lid.


2.  When the 3 kernels pop....


Pour in the sugar.....
 
Give it a little stir and add the 1/2 cup of kernel

3. My husband was hilarious using the lid as a shield to stir the popcorn. It was a good thing he did too, because they were popping out like crazy!!


4) Once the kernels start popping, keep the lid on and every few seconds take the pan off the burner and shake while holding the lid down. (Note: Make sure your lid fits perfectly or the kernels try to make an escape).

5) When you don't hear anymore popping pour kettle corn into bowls and salt to taste.

Verdict?  * * * * * Five stars. This tastes so good and is much cheaper than buying the one in the bag!!

If you found this fun or helpful, please follow me. It gets a little lonely over here thinking that I'm talking to myself.